pygame 2d car tutorial
This tutorial will tell you how to make a top-down car in Python and pygame and make it move with very few lines of code. If you want to try the code before you read the tutorial, you can get it here. The code is tested to run on Python 3.6.
Most of the tutorials on car physics I found online either try to implement a complete simulation of car mechanics or, by contrast, give only a few lines of code without explaining how they work. While you shouldn’t write code you don’t understand, you also don’t need to read about vehicle engineering and differential equations if you only want to get your car sprite to move across the screen. Instead of a dynamic model that takes into account all the forces acting on the wheels, we will use a simple kinematic model.
Kinematic model
Kinematics is a branch of mechanics that describes the motion of objects. It doesn’t consider their masses or forces applied, only velocity, acceleration and position in space. With this approach, a physical body is just a set of moving points on the screen. That means we won’t be talking about engine, gears, transmission, tire friction and other components that are important to a full dynamic model. The main thing we are interested in is HOW the car moves, not WHY. Programming a car movement this way is closer to animation than simulation.
Things required to know
Though this article is very beginner-oriented and there are very few formulae, you should know some basic things before start:
- Linear algebra: vector operations
- Trigonometry: trigonometric functions, triangle similarity
- Mechanics: velocity, acceleration, angular velocity
- Mathematics: integration
Also you need to know Python and pygame, i.e. be able to create an application window, start a game loop, get user input, draw things to the screen, etc. If you don't know it yet, it's a good time to start learning. Though pygame is not suitable for game production, it is great for prototyping and learning.
pygame boilerplate
We start with creating an empty game.py file and adding some boilerplate code.
import os
from math import sin, radians, degrees, copysign

import pygame
from pygame.math import Vector2


class Game:
    def __init__(self):
        pygame.init()
        pygame.display.set_caption("Car tutorial")
        width = 1280
        height = 720
        self.screen = pygame.display.set_mode((width, height))
        self.clock = pygame.time.Clock()
        self.ticks = 60
        self.exit = False

    def run(self):
        while not self.exit:
            dt = self.clock.get_time() / 1000

            # Event queue
            for event in pygame.event.get():
                if event.type == pygame.QUIT:
                    self.exit = True

            # User input
            pressed = pygame.key.get_pressed()

            # Logic
            # Car logic goes here

            # Drawing
            self.screen.fill((0, 0, 0))
            pygame.display.flip()

            self.clock.tick(self.ticks)
        pygame.quit()


if __name__ == '__main__':
    game = Game()
    game.run()
It will initialize pygame and start a game loop. Also we are importing the os module, some math functions and a pygame.math.Vector2 class for later use.
If you need more info on specific functions, pygame documentation is available here.
The car class
Let’s put our car movement logic in a separate class. What information about the car do we need to know to in order to make it moving?
- Position. That is the x and y coordinates of the car
- Velocity, relative to the car, in meters per second
- Angle of the car’s body, relative to the world, in degrees
- Length of the chassis, in meters
- Maximum value of acceleration, in meters per second squared
- Maximum steering value, in degrees
- Current acceleration, in meters per second squared
- Current steering value, in degrees. Negative values mean that the wheels are turned to the right and positive – to the left.
When translated into python code, it looks like this:
class Car:
    def __init__(self, x, y, angle=0.0, length=4, max_steering=30, max_acceleration=5.0):
        self.position = Vector2(x, y)
        self.velocity = Vector2(0.0, 0.0)
        self.angle = angle
        self.length = length
        self.max_acceleration = max_acceleration
        self.max_steering = max_steering

        self.acceleration = 0.0
        self.steering = 0.0
I made angle, length, max_steering and max_acceleration arguments optional, assuming that an average car’s length is 4 meters, average maximum steering angle is 30 degrees and maximum acceleration is 5 meters per second. You can choose different values. Since there is going to be only one car in this tutorial, we don’t really need the ability to create cars with varying parameters.
Linear movement
In order to make our car move, we won’t be changing its position directly. Instead we will increase the acceleration, then integrate the acceleration into the velocity and finally integrate the velocity into the position.
Let’s create an update method to simulate car physics. It is going to be called every frame. Because movement is time-dependent, we’ll need to pass a delta time value to it.
Since we don’t need to know anything about engine, gear, transmission, etc. we assume that the acceleration is already here. All we need is one line:
def update(self, dt):
    self.velocity += (self.acceleration * dt, 0)
We integrate acceleration to car velocity over the time dt – the amount of seconds passed since the last frame. The y component of the acceleration is zero, since the car doesn’t accelerate sideways.
Steering
Steering is a bit more complicated. When the front wheels are steered to the side, the car will drive in a circular motion, describing a circle. You may skip the geometry part and remember that the radius of the turning circle equals to the length of the car chassis divided by the sine of the steering angle. If you want to understand why, continue reading.
For our case let’s assume that the car has only one front wheel that is located at the center of the frontal part and one rear wheel as well (it is a very common simplification).

The radius of the circle described by the front wheel is equal to the AC side of the triangle ABC, formed by the three points: the front wheel, the rear wheel and the center of the steering circle.
If we draw a line of vertical symmetry through the front wheel (green line) and then continue the lines, we’ll see that the angle α is equal to the angle formed between this green line and the car’s vertical symmetry line (blue). This is the car steering angle that we already know from the user input.

If you don’t understand why these two angles are equal, look at the angle β, it is complementary to α. Their sum is 90 degrees, exactly the value of the third angle in the triangle ABC.
We also know the AB – it is the length of the car’s chassis. Dividing by the sine of the steering angle we get the radius. Python math functions accept radians, so don’t forget to convert the value.
turning_radius = self.length / sin(radians(self.steering))
Similar to the position, we won’t directly change car’s angle. To know how fast the car is rotating we need to find the angular velocity:
angular_velocity = self.velocity.x / turning_radius
If the steering angle is zero, angular velocity should be equal to zero too:
if self.steering:
    turning_radius = self.length / sin(radians(self.steering))
    angular_velocity = self.velocity.x / turning_radius
else:
    angular_velocity = 0
We know the velocity and the angular velocity, all we need is to integrate them over the time:
self.position += self.velocity.rotate(-self.angle) * dt
self.angle += degrees(angular_velocity) * dt
That’s it for the simulation of movement. It will take some more lines of code to program user input and drawing.
User input
We don’t want our input code to be inside the Car class, because it doesn’t need to know where it gets its input from – keyboard, gamepad or maybe an AI script. To keep the tutorial small and simple we’ll just put the update code in the main loop.
Create a car instance. We’ll place it at 0, 0 coordinates of the screen space (top left corner). Put this code in the run() method, before the game loop:
car = Car(0, 0)
Then, right below the comment that says "Logic", call the car's update() method, passing the delta time to it:
car.update(dt)
What happens if the user holds the "up" key? Because we don’t have to model car’s throttle, it’s convenient to think that acceleration just increases over time. Let’s change it by a constant value every second:
pressed = pygame.key.get_pressed()

if pressed[pygame.K_UP]:
    car.acceleration += 1 * dt
elif pressed[pygame.K_DOWN]:
    car.acceleration -= 1 * dt
else:
    car.acceleration = 0
Similarly, when the user holds the "down" key, acceleration decreases, and when neither key is held it drops to zero. This way acceleration would increase infinitely, so we need to limit the values. Python doesn’t have a built-in clamp function, but it can be done manually:
car.acceleration = max(-car.max_acceleration, min(car.acceleration, car.max_acceleration))
The same approach applies for steering. We change it by a constant value over the time, then limit by maximum and minimum values. I’ve used 30; that means it takes one second to turn the front wheels by 30 degrees. You can use different values if you want faster or slower steering.
if pressed[pygame.K_RIGHT]:
    car.steering -= 30 * dt
elif pressed[pygame.K_LEFT]:
    car.steering += 30 * dt
else:
    car.steering = 0
car.steering = max(-car.max_steering, min(car.steering, car.max_steering))
Clamping after changing the value instead of multiple if/else blocks is a good practice (in my opinion): this way you won’t accidentally step over the max limit. Also the code is more compact this way.
Draw your brakes
Next thing we want to implement is braking. In terms of kinematics "braking" means "decelerating to a zero velocity". In games, we usually want brakes to be activated when the user holds a direction key that is opposite to the current direction of the motion. Additionally, brakes also need to be activated on the spacebar key. This requires changing our initial movement code a little:
if pressed[pygame.K_UP]:
    if car.velocity.x < 0:
        car.acceleration = car.brake_deceleration
    else:
        car.acceleration += 1 * dt
elif pressed[pygame.K_DOWN]:
    if car.velocity.x > 0:
        car.acceleration = -car.brake_deceleration
    else:
        car.acceleration -= 1 * dt
elif pressed[pygame.K_SPACE]:
    if car.velocity.x != 0:
        car.acceleration = copysign(car.max_acceleration, -car.velocity.x)
else:
    car.acceleration = 0
car.acceleration = max(-car.max_acceleration, min(car.acceleration, car.max_acceleration))
The copysign function copies the sign of the car longitudal velocity and then the opposite of this value is used to decelerate the car.
Make sure that the deceleration value you apply when breaking is large enough to produce a realistic braking distance. I have chosen it to be 10 meters per second. Obviously, you need to declare it in the car’s __init__() method.
Drawing the car

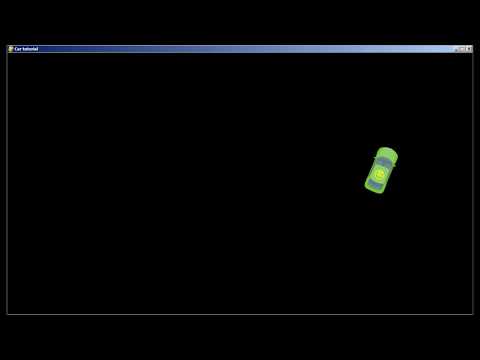
First, let’s load a car image. You can use the one above, I've made it in Inkscape. Put the image file in the same directory as your game script.
current_dir = os.path.dirname(os.path.abspath(__file__))
image_path = os.path.join(current_dir, "car.png")
car_image = pygame.image.load(image_path)
The two top lines are required to make sure the image is loaded on all systems and independent of your current working directory. The third line loads the image and stores it in the variable.
Add the following lines to you game loop after the self.screen.fill() and before pygame.display.flip() function calls:
rotated = pygame.transform.rotate(car_image, car.angle)
rect = rotated.get_rect()
self.screen.blit(rotated, car.position - (rect.width / 2, rect.height / 2))
This will draw the car image. To align the center of the image with the car position, we subtract the half of the image bounding rectangle from its original position. If you run the code now you’ll notice that the car moves very slowly. This is because the movement is calculated in meters, and the screen space is measured in pixels. We need to apply pixel per unit ratio to the drawing position. An average car is about 4 by 2 meters in size, and the car image I made is 128 by 64. Our game unit is equal to the real world meter. This gives the ratio of 32:
ppu = 32
self.screen.blit(rotated, car.position * ppu - (rect.width / 2, rect.height / 2))
Bounding rectangle width and height are not multiplied by PPU because they are already measured in pixels. It is convenient to do all calculations in game coordinates, and then convert it to the screen coordinates applying constant pixel per unit ratio.
Eternal motion
Our car can drive, steer and apply breaks. But it will never reach physical speed limit, neither will it stop on its own. In real life, car engines have maximum power, and air friction and rolling resistance make them slow down. Since we don’t care about forces, we can just impose a maximum velocity limit similar to how we did with steering and velocity. E.g.:
self.velocity.x = max(-self.max_velocity, min(self.velocity.x, self.max_velocity))
It solves the first problem, but not the second. Let’s change our input code: when neither "up" nor "down" key are held, instead of setting acceleration to zero we’ll make it opposite to the direction of movement:
if car.velocity.x != 0:
    car.acceleration = -copysign(car.free_deceleration, car.velocity.x)
free_deceleration is an arbitrary value, you can tweak it as you want. The main point is that we want the car to come to a complete stop if no keys are pressed by the user.
Eliminating the bugs
If you print() car’s acceleration and velocity, you’ll see that they never reach zero, even if the car does not appear moving on the screen. Also, if you hold the space key, car will start twitching back and forth by a pixel. That happens because in our braking and deceleration code we decrement acceleration by a value and not checking if the result will bypass the zero. Let’s fix this:
elif pressed[pygame.K_SPACE]:
    if abs(car.velocity.x) > dt * car.brake_deceleration:
        car.acceleration = -copysign(car.brake_deceleration, car.velocity.x)
    else:
        car.acceleration = -car.velocity.x / dt
else:
    if abs(car.velocity.x) > dt * car.free_deceleration:
        car.acceleration = -copysign(car.free_deceleration, car.velocity.x)
    else:
        if dt != 0:
            car.acceleration = -car.velocity.x / dt
Instead of comparing velocity to zero, we need to compare it with the decrement value. Now if you run the code and print out the acceleration and the velocity, you should see that they decrease exactly to zero.
Further improvements
I believe that this tutorial is a good start for a simple arcade game. What can you add to improve it?
Observe how cars move in real life. For example, when a car turns, its origin of rotation is not in the center of the geometry, but at the rear wheels axis. Another example is high speed steering – you may want to add a sideways motion to the velocity component to simulate drifting.
The kinematic approach is good enough unless your game requires simulation of real vehicles or realistic collisions of objects with mass. In this case, you would need to use a 2d physics library such as Box2d or Chipmunk.
The full code of the tutorial is available here.